Bật tính năng DHCP tích hợp trong Dnsmasq và Định cấu hình Máy chủ DHCP. Trước tiên hãy Cài đặt và Cấu hình Dnsmasq trên CentOS 8
1. Định cấu hình Dnsmasq cho dịch vụ DHCP trên CentOS 8
Chỉnh sửa file dnsmasq.conf theo đường dẫn
vi /etc/dnsmasq.conf
Tại dòng 58 thêm dải IP vào
dhcp-range=10.0.0.200,10.0.0.250,12h
Tại dòng 332 thêm Gateway, NTP, DNS, Subnetmask
dhcp-option=option:router,10.0.0.1
dhcp-option=option:ntp-server,10.0.0.10
dhcp-option=option:dns-server,10.0.0.10
dhcp-option=option:netmask,255.255.255.0
[root@dlp ~]# vi /etc/dnsmasq.conf
# line 158: add ranges of IP address to lease and term of lease
dhcp-range=10.0.0.200,10.0.0.250,12h
# line 332: add entries for Gateway, NTP, DNS, Subnetmask
dhcp-option=option:router,10.0.0.1
dhcp-option=option:ntp-server,10.0.0.10
dhcp-option=option:dns-server,10.0.0.10
dhcp-option=option:netmask,255.255.255.0
[root@dlp ~]# systemctl restart dnsmasq
Khởi động lại dịch vụ dnsmasq
systemctl restart dnsmasq
2. Nếu Firewalld đang chạy, hãy cho phép dịch vụ DHCP. Máy chủ DHCP sử dụng [67/UDP].
firewall-cmd --add-service=dhcp --permanent
firewall-cmd --reload
[root@dlp ~]# firewall-cmd --add-service=dhcp --permanent
success
[root@dlp ~]# firewall-cmd --reload
success
3. Định cấu hình DHCP Client trên CentOS 8
Chạy các dòng lệnh bên dưới để cài đặt dhcp trên máy client
dnf -y install dhcp-client
nmcli connection modify enp1s0 ipv4.method auto
nmcli connection down enp1s0; nmcli connection up enp1s0
# install DHCP client if not installed (generally installed by default)
[root@client ~]# dnf -y install dhcp-client
[root@client ~]# nmcli connection modify enp1s0 ipv4.method auto
[root@client ~]# nmcli connection down enp1s0; nmcli connection up enp1s0
4. Định cấu hình DHCP Client trên Windows
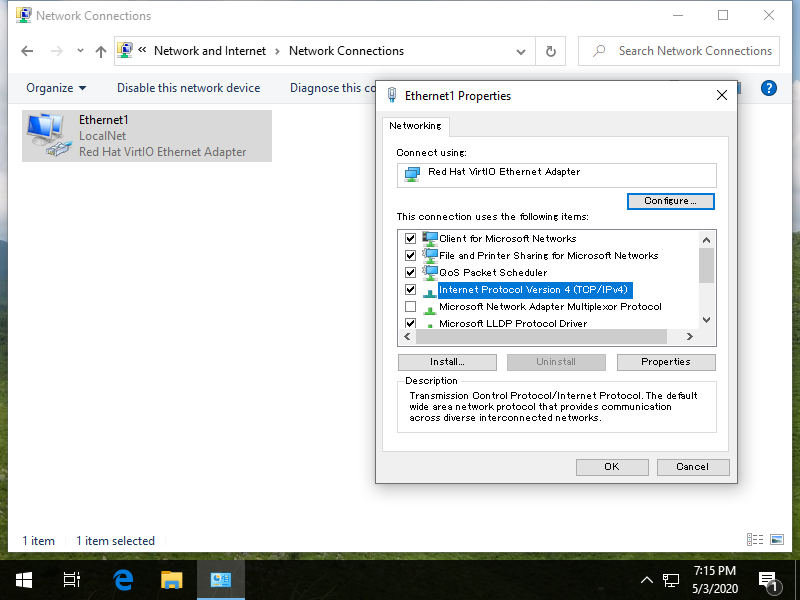
Mở cài đặt mạng và chọn Internet Protocol version 4 và nhấp vào nút Properties.

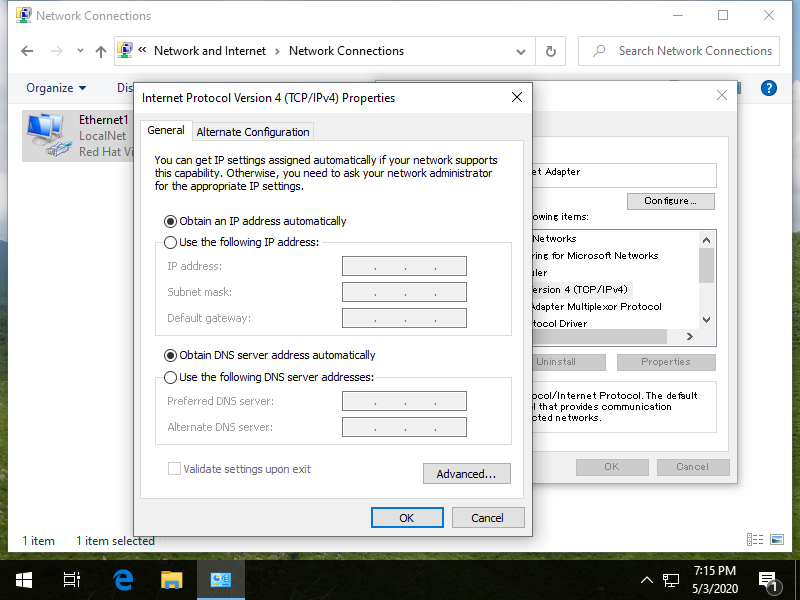
Chọn như hình bên dưới, sau đó địa chỉ IP được cấu hình lại tự động.

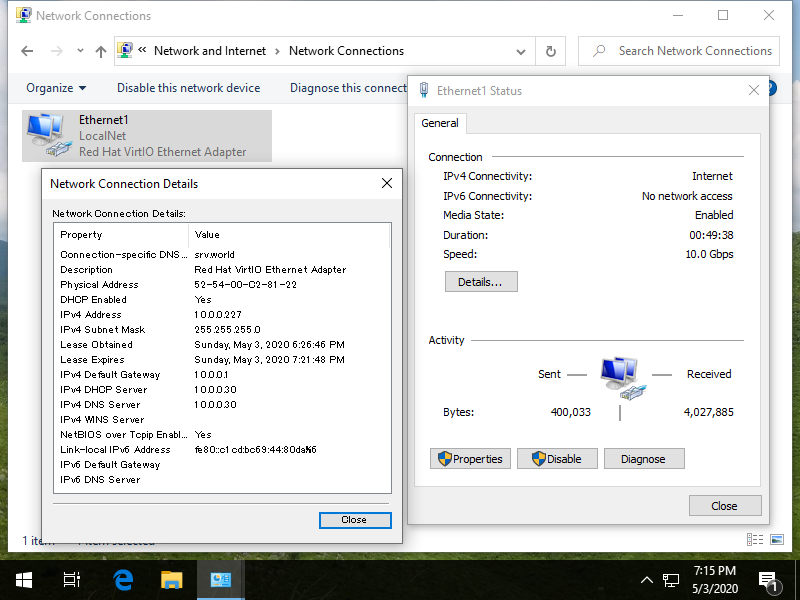
Kiểm tra trạng thái mạng Địa chỉ IP đã được gán thành công hay chưa.

Chúc các bạn thành công! Mọi thắc mắc, cần hỗ trợ hãy bình luận bên dưới hoặc qua Fanpage Facebook, form liên hệ.


